Step 1: First of all with the help of your USB driver connect the iPhone device to the PC, after that launch the iTunes (you must be ensure that it is updated).
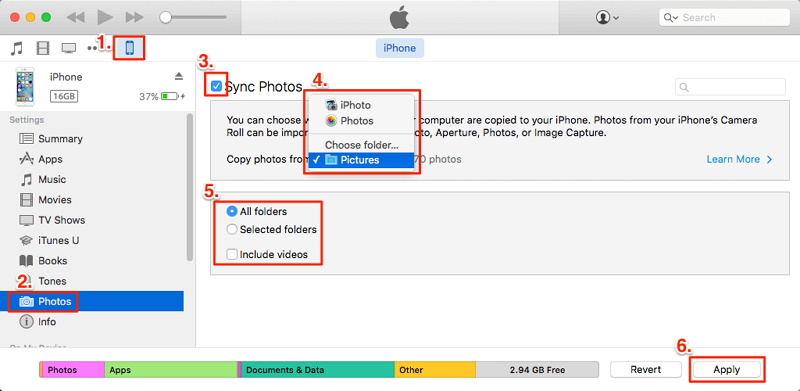
Step 2: After iTunes page opens, next step will be to visit the Device icon > there from left pane go for Photos option > then you will see the syncing page for photos appear > you need to click on sync photos option > doing so will ask you to choose the desired folder where you want to save the photos, lets say you have the option to save in iPhoto option, Photos folder or else you can choose any other folder as per your requirement > and finally press Apply.
Note: In case you need all folders to get transferred from your PC then under marked number (5) select all folders otherwise choose selected folder and then go for apply the transfer/syncing process for your photos.

Step 1: Download the free copy of dr.fone – Transfer (iOS) from the above blue section.
Step 2: Install the application and accept the terms and conditions to proceed with the process to transfer photos from computer to iPhone.
Step 3: As you will see the interface is lucid and intuitive to use. Click on the transfer tile on the home screen.
Step 4: Connect your iPhone to the pc. The system will take a couple of moment to recognize your device. Once the device is recognized you will be able to see the device name and photo in the dr.fone interface.
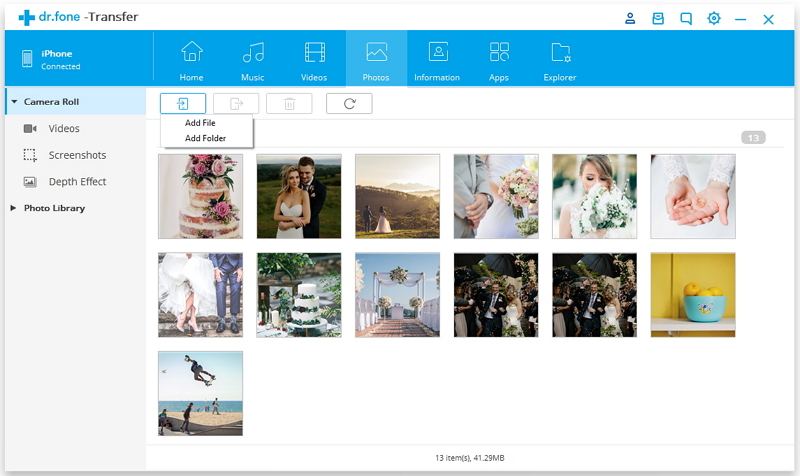
Step 5: On clicking on the transfer tile, you must have been presented with various options that are available in the dr.fone transfer feature. Click on the button that says "Photos" under the menu tab
Step 6: The software will analyze the files present in your system and your device. Now click Add File or Add Folder and select the files that you would like to transfer from pc to device.

.jpg)


