Dear, have you ever encountered the same problem? Your phone is turned into a waste because your password is too many times and your phone screen is locked The ways to unblock a password locked iPhone, besides from entering the code, is to factory reset. But if you factory reset you will lose the data and your iPhone setting.So Backup/Recover Data from iPhone with Locked Screen?
Also Read:
How to Backup and Restore iPhone/iPad Data without using iTunes/iCloud
How to Unlock iPhone/iPad Locked Screen without Data Loss
Backup/Recover Data from iPhone with Locked Screen
When you can not access iPhone data or forget the lock screen password, do not panic, do not be too sad, there must be a way to help you solve. So we will introduce a powerful and easy to use software iPhone Data Recovery, which can help you restore contacts, messages, pictures, notes and call history etc.It allows you to scan your iPhone directly and selectively recover data from your iPhone.In addition, you can use IOS data backup & restore to back up your iPhone data. Both softwares work on all iPhones, including the latest iPhone 11.You can download the trial version.
How to Backup/Recover Data from iPhone with Locked Screen
Part 1. Recover Data on a Locked iPhone via iTunes/iCloud
Part 2. Backup and Restore Locked iPhone Data on the Computer
You can also just as easily erase and then recover the data on your locked iPhone via either iTunes or iCloud if you had backed up your data on iTunes/iCloud.
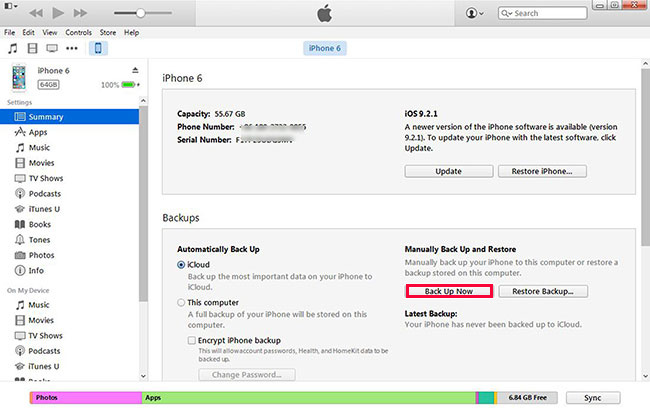
Take iTunes as an example, if you have sync your iPhone with iTunes before and haven't restart your device after you connected to iTunes in the last time, then iTunes will remember the password. So you can backup locked iPhone with iTunes and then restore the backed up data to your iPhone 7/7 Plus, iPhone 6S/6S Plus, iPhone 6/6 Plus, iPhone 5S/5C/5, iPhone 4S/4, iPad and more iOS devices.

Follow the instructions until you enter the settings screen, and then click "Restore from iTunes Backup". Select the device in iTunes, and then select the latest backup to restore the device.
However, there are many iOS users who haven't sync their device with iTunes or they have restarted the locked iPhone after the last connection with iTunes, then it is impossible for iTunes to backup data on locked iPhone. Then what should we do? Let's check the next part.
Through the introduction above, we already know how to retrieve the locked iPhone data through iTunes synchronization or iCloud backup. But what if I haven't done both of these before? In this section, we will show you a powerful tool - iOS Data Backup&Recovery, which can directly backup locked iPhone data to PC and Mac computer, and then restore back to the device or another iPhone iPad from the backups.
The tool supports to extract or backup iPhone videos, call history, notes, messages, contacts, photos, iMessages, Facebook messages and many other data.


.jpg)
.jpg)
.jpg)
.jpg)

