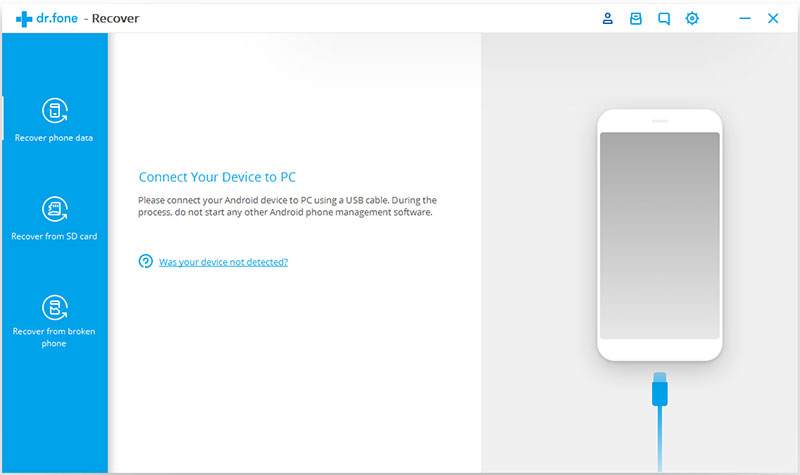
Step 1.Launch dr.fone
Open dr.fone and use the cable to connect your Android device with your computer. Choose "Recover". To recover the data from the damaged phone, click on "Recover from broken phone" located on the left side of the window.
Step 2. Selecting file types to recover
After the scan is complete, you will see a window for choosing the types of files you want to recover. You can select specific files by clicking next to them or go for "select all" option. The file types that can be recovered using Wondershare dr.fone include Contacts, Call history, Messages, Photos, Media files, WhatsApp messages and Documents. Click "next" to proceed.
Step 3. Determine the type of fault
You will need to select the type of fault you are dealing with after the types of files are selected. There will be 2 options on the screen - "Touch doesn't work or cannot access the phone" and "Black/broken screen". Click on your respective fault type to proceed to next stage.
The next window gives you option of choosing your device make and model. Select the appropriate option from the drop down list and click on "next". This feature works only with selected Samsung Galaxy phones and tabs.
Step 4. Initiating download mode on Samsung Galaxy
You need to follow the instructions provided on the window to start the process:
• Switch off the phone
• Now keep the phone's "volume decrease" button and the "home" and "power" buttons pressed for a while.
• Then press the "volume increase" button to begin download mode.
Step 5. Analyzing your Samsung Galaxy
Next dr.fone will match with you Galaxy model and automatically analyze the data on it.
Step 6. Select and recover the data from dead Samsung Galaxy
After successful completion of the scanning, you will see your data sorted out in categories on the left hand side of dr.fone window. You can preview your scanned data and select the ones you need to backup. After you are done with selecting, click the "Recover" button to begin the process.

.jpg)
.jpg)
.jpg)
.jpg)
.jpg)
.jpg)

