"I have a problem with iPhone. When I restored my iPhone in iTunes, there was a error 9006. I have tried many ways to solve this problem. What should I do to Fix iPhone Error 9006 on iTunes Issue? ''
Also Read:
How to Fix iTunes 9/4005/4013/4014 Error when Restore iPhone
How to Get Rid of iPhone Error 14 on iTunes


dr.fone toolkit -iOS System Recovery has made it easier as never before for users to get iPhone, iPad and iPod touch out of white screen, Recovery Mode, Apple logo, black screen, and fix the issues when your iOS device perform abnormally. It will not cause any data loss while repairing the iOS system issues.
Note: after using this function, your iOS device will be updated to the latest iOS version. And if your iOS device has been jailbroken, then it will be updated to non-jailbroken version. If you have unlocked your iOS device before, then it will be re-locked again.
Launch dr.fone and choose Repair from the main window.
.jpg)
Then connect your iPhone, iPad or iPod touch to your computer with its lightening cable. When dr.fone detects your iOS device, click "Start" to continue the process.

Then it will display the device information, such as device model, system version, baseband version, etc. Click on Next to continue.

If your iPhone/iPad/iPod is not function normally, dr.fone - Repair will remind you to boot the device in DFU mode. Follow the instruction below to boot iPhone/iPad/iPod Touch in DFU mode.
Steps to boot iPhone 7, iPhone 8 and iPhone X in DFU mode:

Steps to boot other devices in DFU mode:

To guarantee a successful system recovery, please select the correct device phone model and firmware information. Then click on Download.
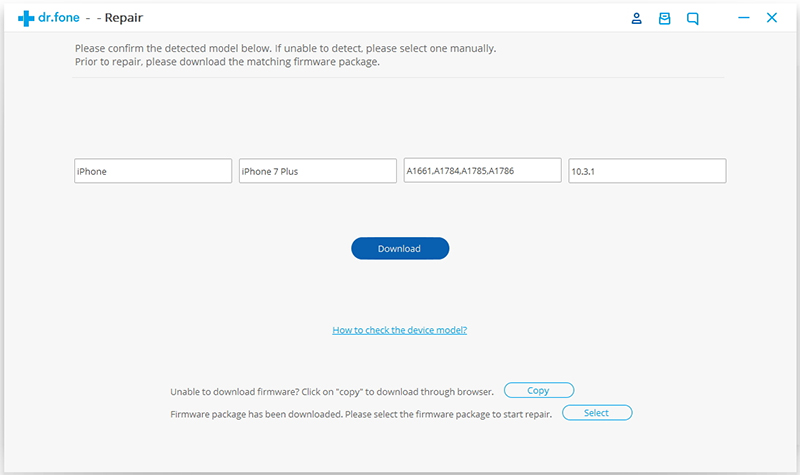
Since the firmware we need to download is large, it will take some time to complete the download. Make sure your network is stable during the process. If the firmware is not download successfully, you can also click on Copy to download the firmware from Apple official website and click on Select to restore the downloaded firmware.
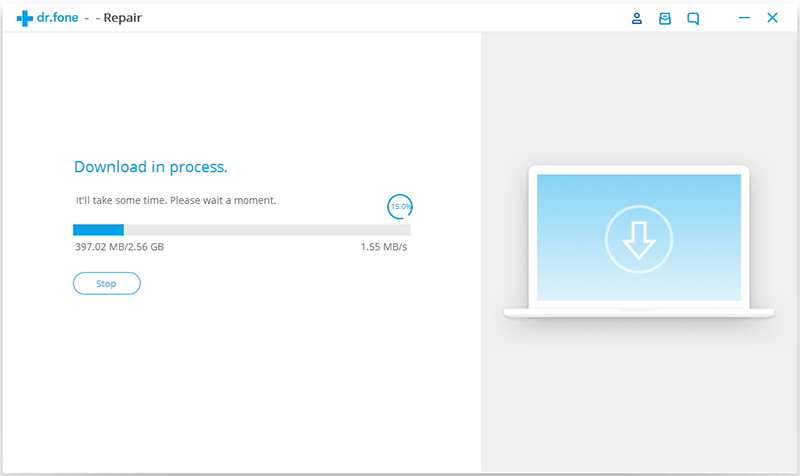
When the download is complete, click on Fix Now to start repairing your iOS and to get your iOS device to work normally again.

After the repairing process completes, normally your iPhone, iPad, or iPod Touch will restart into normal mode. If it does not boot normally, you can click on Try Again to try the process again.